
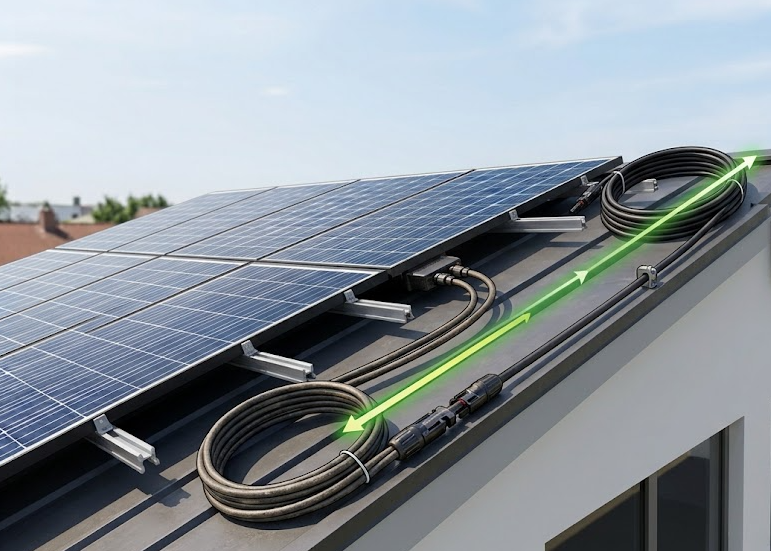
The supplied cables that come with most plug-in solar kits are 1 metre long. Your panel is on the fence. Your inverter is on the shed wall four metres away. So the first practical question almost every new installer asks is: how far can these cables actually run?
The answer involves some straightforward physics, a couple of numbers worth knowing, and one strong piece of advice about where to put your microinverter. Here is everything that matters.
Why DC cable length matters: voltage drop
Solar panels generate DC electricity at a relatively low voltage — a standard 400W to 500W panel produces around 30 to 40 volts at its maximum power point. The current at that voltage is around 10 to 13 amps. Those numbers matter because the combination of current and cable resistance determines how much voltage you lose over the run — and that lost voltage is lost power.
Voltage drop is calculated on the round-trip length of the cable. A 5-metre cable run from panel to inverter means 10 metres of total conductor, because current flows out through the positive lead and back through the negative. The solar industry standard is to keep total DC cable voltage drop below 2% from panels to inverter. Below 1% is ideal for short runs.
Why does this matter in practice? A long DC cable can cause problems. If the voltage at the microinverter’s DC input drops below its minimum operating voltage, the inverter will not start or will reduce its output. With a Hoymiles microinverter, the MPPT range is typically 16 to 60V. A single 400W panel produces about 34V at maximum power. On a dull winter day, that might drop to 25V. If you have added 10 metres of undersized DC cable and lost 3 to 4 volts, you are operating right at the edge of the MPPT range and the inverter might start cycling on and off.
The practical cable length limits for plug-in solar
For a standard UK plug-in setup using 4mm² DC solar cable with a single 400W to 500W panel:
Up to 5 metres: no issue at all. Voltage drop is well under 1%. This is where most plug-in solar installs sit, and why the supplied 1-metre cables are usually fine — the inverter mounts right at the panel.
5 to 10 metres: still fine on 4mm² cable. Voltage drop is around 1.4% at 10 metres on a 400W panel drawing 10A. This is within the 2% recommended maximum with margin to spare.
10 to 20 metres: manageable on 4mm² but getting close to the limit. At 20 metres, voltage drop on 4mm² cable at 400W is about 2.8% — already past the 3% maximum recommended voltage drop. You can extend to this length but you should move up to 6mm² cable, which halves the voltage drop. At 20 metres on 6mm², voltage drop is around 1.4% — back within the safe zone.
Beyond 20 metres: technically possible but increasingly inefficient. At 30 metres on 4mm² cable you are losing over 10% of your power as heat in the cable. At 30 metres on 6mm² you are still around 7% — not ideal. If you genuinely need a run this long, the better answer is to rethink the inverter position rather than extend the DC cables.
The right answer to long DC runs: move the inverter
This is the key insight that saves most of the problem. With plug-in microinverters, the inverter converts DC to AC right at the panel. The AC cable run from the inverter back to the house can be much longer than the DC cable run with far less loss — because AC at 230V carries the same power at much lower current than DC at 34V, and voltage drop is proportional to current.
Put the inverter as close to the panels as physically possible. Mount it on the back of the panel frame, on the fence post directly below the panels, or on the bracket the panels are mounted on. Then run the AC output cable — which is simply a standard electrical flex with a plug on one end — back to the house socket. That cable can be 10, 15, even 20 metres without meaningful loss. The DC section stays at 1 metre or less.
This is the design principle behind all quality microinverters — the EcoFlow STREAM Microinverter, Hoymiles HMS-800, and Anker SOLIX RS40P are all designed to sit right at the panel, not in the house. The supplied 1-metre cables exist because that is all the DC run you need when the inverter is where it should be.
How weatherproof are the inverters?
Good news here. The EcoFlow STREAM Microinverter has an IP67 rating and can be used indoors or outdoors. IP67 means the unit is fully dust-tight and can withstand immersion in water up to 1 metre for 30 minutes. For a UK outdoor installation that means rain, frost, morning dew, and hose-down cleaning of the panels are all fine. It is not going to be troubled by British weather.
The Hoymiles HMS-800 is IP67 rated. The Anker SOLIX RS40P is IP67. Most quality microinverters sold for residential use in 2026 are IP67 as a baseline. IP65 (dust-tight, protected against water jets) is the minimum worth accepting. Anything below that — or anything that does not clearly state an IP rating — should not be mounted outdoors in the UK.
The battery-integrated STREAM units (Pro, Ultra, Ultra X) are rated IP65, which is fine for outdoor installation in a sheltered position but means you should avoid mounting them where they will be directly rained on continuously. The EcoFlow spec sheet recommends a well-ventilated, shaded, cool location for all inverters regardless of IP rating — not because of weatherproofing but because of thermal performance. Heat is the enemy of output, not rain.
One caveat on IP ratings: they are tested at the factory with all connectors fitted and sealed. A DIY install where the MC4 connectors are not fully clicked together, or where the inverter’s AC output connector is not properly seated, can compromise the rated weatherproofing at those points. Make sure all connections are fully locked — MC4 connectors click audibly when they are properly engaged.
Can you make your own DC cables?
Technically yes. Practically, it is something to do carefully and only when you have a genuine reason.
The cable specification you need is H1Z2Z2-K solar DC cable — this is the European standard cable for outdoor solar PV use, rated for UV exposure, temperature extremes, and direct burial. It comes in 4mm² for runs up to around 15 to 20 metres and 6mm² for longer runs. It is available from electrical wholesalers, online solar suppliers, and City Plumbing. Expect to pay around £0.80 to £1.50 per metre depending on gauge and supplier.
The connectors are MC4 — Multi-Contact 4mm — the click-together waterproof connectors you will find on virtually every solar panel and microinverter available today. You can buy MC4 male and female connectors separately and crimp them onto cut lengths of H1Z2Z2-K cable. You need a dedicated MC4 crimping tool — they cost around £15 to £25 and the specific tool matters because an incorrectly crimped MC4 is a fire risk. Do not substitute a generic crimp tool.
The reason to make your own rather than buy pre-made extension cables: custom lengths. If you need exactly 3.7 metres and the available pre-made options are 3m or 5m, making your own cable at the exact length avoids unnecessary coiling and potential heat build-up. It also works out cheaper per metre on longer runs.
The reason to buy pre-made instead: they are tested, rated, and ready. Pre-made MC4 extension cables from reputable suppliers are correct gauge, correctly crimped, and weatherproofed at the connector. For most plug-in solar installs where you need 2, 3, or 5 metres, a pre-made extension cable from Amazon, eBay, or a solar supplier costs £5 to £15 and eliminates any risk from a DIY crimp. City Plumbing stocks MC4 extension cables alongside their panel range.
If you do make your own: keep both conductors the same length, do not mix cable gauges in a single run, double-check polarity (red or positive to positive, black or negative to negative — MC4 connectors are keyed but human error still happens), and test with a multimeter before connecting to the inverter.
Panel and inverter location: the practical checklist
Before finalising your layout, run through these five questions:
How far is the panel from the house socket? If the answer is more than 10 to 15 metres, think carefully about how you route the AC cable rather than extending the DC cable. An AC extension on a quality 1.5mm² flex is fine up to 20 metres and loses far less than the equivalent DC run.
Is there a clear cable route from the panels to the socket? Cables that cross paths, lie on the ground where they could be tripped over, or run through conditions where they could be damaged need protection. Surface-mounted trunking is the cleanest solution for garden installations. The DC cable should never be buried without armoured cable — H1Z2Z2-K is UV-rated but not burial-rated.
Can the inverter mount within 1 to 2 metres of the panels? If yes, use the supplied cables and run AC back to the house. This should be the goal for every installation.
Is the proposed inverter location in direct sun? If yes, move it. Even an IP67-rated inverter in direct summer sun will throttle output from heat. Behind the panel, on the shaded face of a fence, or on a north-facing wall are all better options.
Is there a clear cable entry point into the house? The AC cable from the inverter needs to reach an outdoor socket or a hardwired entry point. EcoFlow makes a super-flat MC4 cable specifically for routing through window gaps without drilling — at 0.5 metres length with a 1.5mm² conductor and weatherproof construction. For more permanent installs, a cable gland through an outside wall or soffit is neater.
The cable spec summary
DC cable type: H1Z2Z2-K solar cable, double insulated, UV rated.
DC cable gauge: 4mm² for runs up to 15 metres per panel. 6mm² for 15 to 30 metres. Beyond 30 metres, move the inverter.
DC cable maximum recommended length: 10 metres on 4mm² for under 2% voltage drop. 20 metres on 6mm² for the same.
Connectors: MC4 — pre-made cables preferred for most installs, DIY crimping acceptable with the correct tool and care.
Inverter IP rating minimum: IP67 for outdoor UK installation.
Inverter location: as close to the panels as possible, in shade, with airflow.
AC cable: standard electrical flex, 1.5mm² minimum, plug to socket. Up to 20 metres without meaningful loss.
Further reading
For everything about positioning your panels and inverter for maximum output, the Getting Started guide covers tilt angle, orientation, and shading in detail. The EcoFlow STREAM FAQ has the specific MPPT input specs for every STREAM product including voltage and current limits. If output seems low despite everything looking right, our underperforming panels guide works through every common cause. And for the full picture on what the UK regulations require for a compliant installation, see our rules and regulations page.
If you have sorted out a long cable run in a way that is not obvious from the above, or if you have run into a problem that is not covered here, leave it in the comments. These are the questions that rarely get asked and often really matter on installation day.